When to use the guided pass
When you want a portrait to look like a good day rather than a different person, and you do not want to learn a retouching desk to get there. The three steps are the order a careful retoucher works in anyway: marks first, because a spot removed before smoothing leaves nothing for the smoother to spread; skin second, at a low value; eyes last.
If you already know the tools, the front page opens the same desk without the steps. If the picture is a document photo for a form, use the passport and ID page instead — those rules forbid most of this.
What each step does
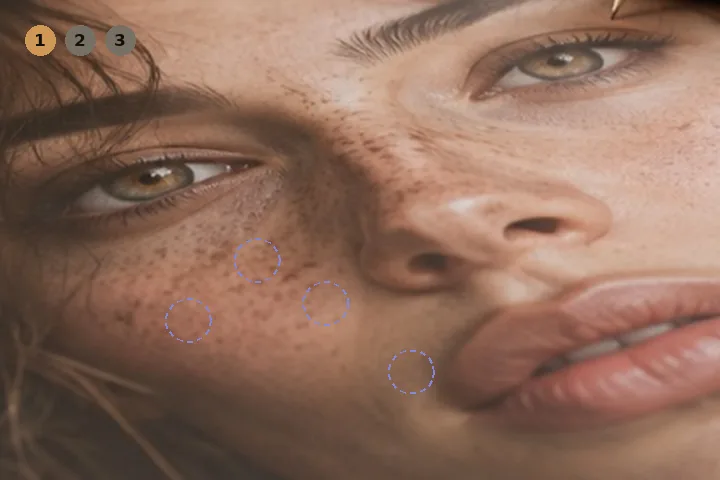
Spots puts the heal brush in your hand. Find spots proposes small marks that differ from the skin around them, ringed on the picture and listed; nothing is healed until you press Heal on a proposal or Heal these. Skin turns the skin layer on at 15 per cent inside the working region — Skip turns it back off. Eyes runs the red-eye check and rings any red pupil for you to accept. Save opens the format, Fit a limit and square framing options.
- Step 1
- Spots — proposals, never automatic
- Step 2
- Skin — on at 15%, texture kept
- Step 3
- Eyes — red-eye check, accepted per pupil
- Step 4
- Save — JPG, PNG, WebP where supported, or a KB limit
- Compare
- hold Space or press Source on any step
What it will not do
- It does not decide what a blemish is. The spot finder is deliberately timid and only proposes; a mole or a freckle is yours to keep.
- It does not remove lines or reshape. Lines are softened, at most 70 per cent, on the wrinkles page; nothing changes the shape of a face.
- It is not for document photos. Passport and visa rules want appearance unaltered.
What people ask
Can I skip a step?
Does anything happen without me pressing it?
How do I compare a step?
Is my photo uploaded?
Why 15 per cent for skin?
Read next
- Spots and blemishesOpens with the heal brush in hand and the region already over the face.
- Skin smoothingOpens with the skin layer at 25 per cent, which leaves three-quarters of the texture.
- Flash red-eyeLooks for red pupils as soon as a picture opens, in the eyes it found, and asks first.
- How far is too farWhere the caps sit, why they are there, and what the distance readout is measuring.
- Why nothing here reshapes a faceThe one exclusion that is a decision rather than a boundary, and the reasoning behind it.